
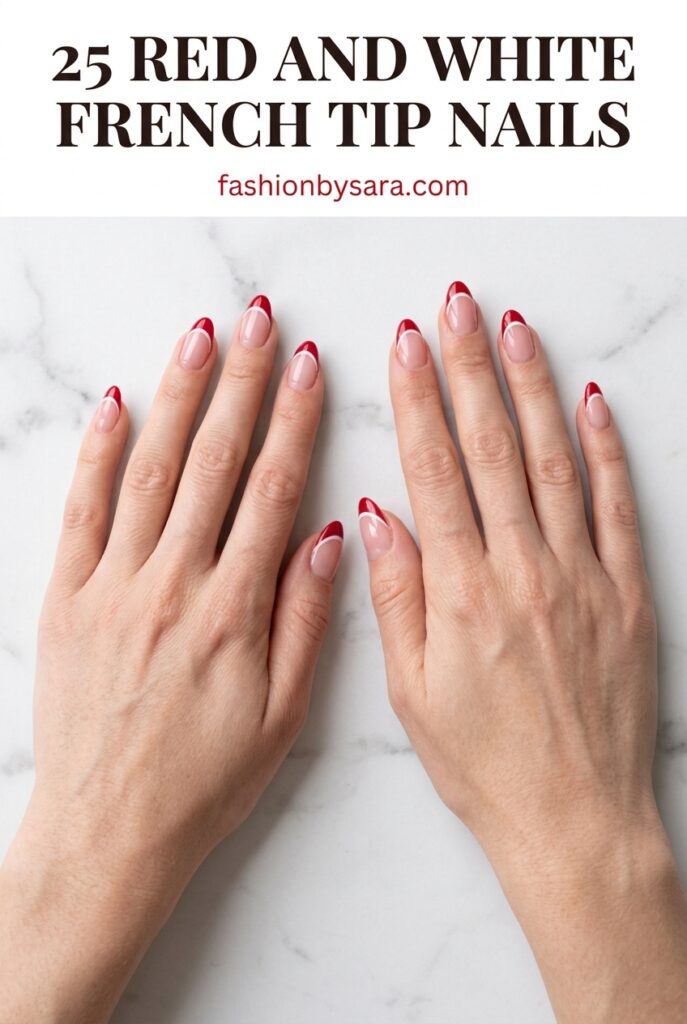
A French manicure is the most classic nail look there is. Swap the plain white tip for red and white, and it becomes bolder and more fun, while staying neat enough for work.
Below are 25 red and white French tip nails, from simple short tips you can paint in ten minutes to candy cane stripes, tiny hearts and glitter. Each design lists the skill level, the best nail shape and easy steps. They work for Valentine’s Day, Christmas, the Fourth of July and every ordinary week in between.
In this post32 sections
- Find Your Design Fast
- Choose Your Red
- What You'll Need
- 3 Easy Ways to Paint a Clean French Tip
- 1. Classic Red Tip with a White Line
- 2. Alternating Red and White Tips
- 3. Half Red, Half White Split Tips
- 4. Short Square Micro Tips
- 5. Red Nails with White French Tips
- 6. Milky White Nails with Red Tips
- 7. Coffin V-Tips in Red and White
- 8. Candy Cane Striped Tips
- 9. Red Tips with White Polka Dots
- 10. White Tips with Tiny Red Hearts
- 11. Red Tips with Cherries
- 12. Red Glitter Tips with a White Line
- 13. Red Chrome Tips on a Pearly White Base
- 14. Red and White Swirl Tips
- 15. Diagonal Side Tips
- 16. Red Half-Moons with White Tips
- 17. Dark Red and White French Tips
- 18. Pink, Red and White French Tips
- 19. Red and White Tips with a Gold Line
- 20. Red Tips with White Stars
- 21. Red Tips with White Daisies
- 22. White Tips with a Tiny Red Bow
- 23. Red Tips with a White Snowflake
- 24. Red to White Ombré Tips
- 25. Red and White French Tip Toes
- Tips for Crisp French Tips That Last
- Frequently Asked Questions
- Final Thoughts
Find Your Design Fast
| You want | Try design |
|---|---|
| Simple and easy | 1, 2, 4, 5, 6 |
| Short nails | 2, 4, 9, 16, 22 |
| Square nails | 3, 4, 15, 19 |
| Coffin and stiletto nails | 7, 12, 14, 24 |
| Christmas | 8, 12, 17, 23 |
| Valentine’s Day | 10, 11, 18, 22 |
| With glitter, chrome or gold | 12, 13, 19 |
| Toes | 25 |
Choose Your Red
- Bright cherry red: Playful and fresh. Best for spring, summer and Valentine’s Day.
- Classic true red: The most versatile shade. It suits every skin tone and every season.
- Dark red or wine: Rich and elegant. Best for fall, winter and evenings.
For the white, a soft or milky white looks more modern than a stark, chalky one. For the base, use a sheer pink or nude that is close to your natural nail color.
What You’ll Need
- Base coat and a glossy top coat
- Sheer pink or nude polish for the base
- Red polish and white polish (regular or gel)
- A thin liner brush for tips and lines
- French tip guide stickers or a silicone nail stamper
- A dotting tool or toothpick for dots and hearts
- A small flat brush and nail polish remover for clean-up
- Optional: glitter polish, chrome powder, gold striping tape, nail stickers
3 Easy Ways to Paint a Clean French Tip
- Guide stickers. Stick a curved guide just below where you want the tip, paint above it, and peel it off while the polish is still wet. This is the easiest way for beginners.
- Silicone stamper. Paint a thin layer of polish onto a soft nail stamper and press the tip of your nail into it at an angle. It makes a perfect curved tip in seconds.
- Freehand with a liner brush. Draw the curved smile line first, from one side to the other, then fill in the tip. Keep the brush still and turn your finger.
Whichever method you use, dip a small flat brush in remover and tidy the smile line before you add top coat.
1. Classic Red Tip with a White Line
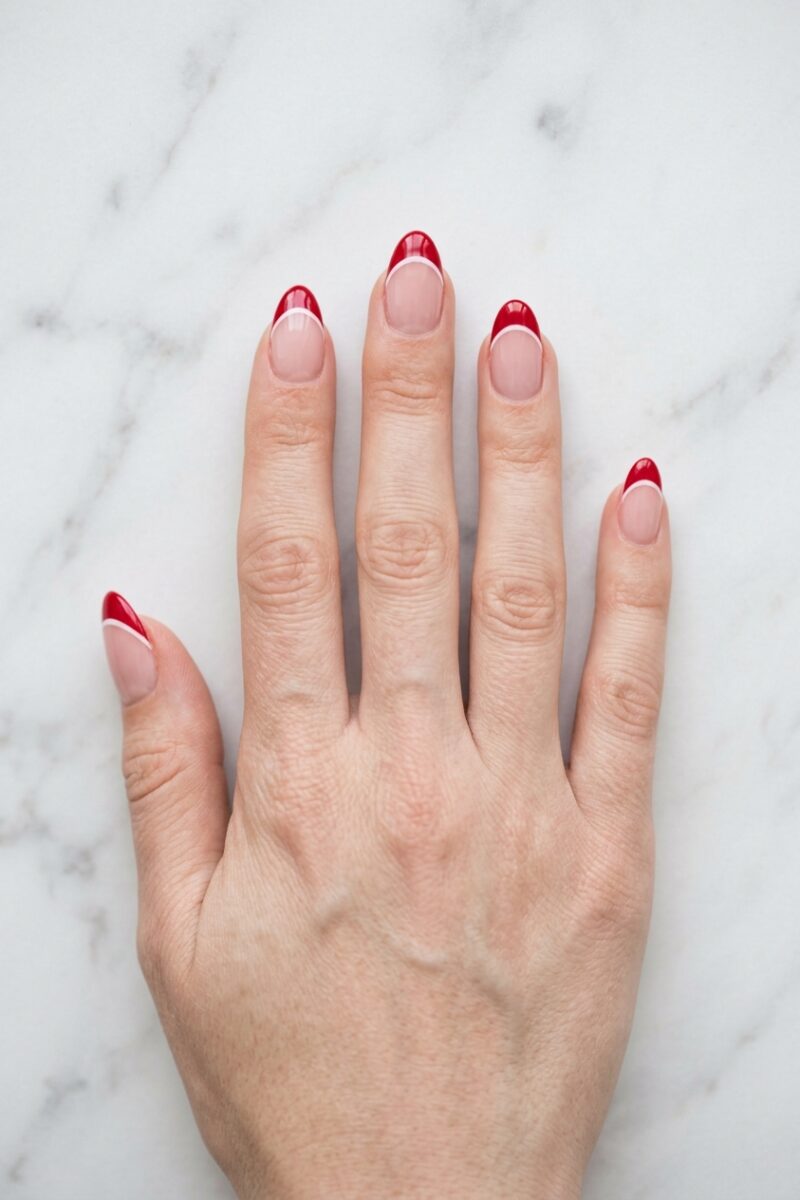
This is the design most people mean by “red and white French tips”. A red tip with a fine white line under it is clean, modern and easy to wear.
Skill level: Easy to medium. Best for: Medium almond, oval or square nails.
- Apply base coat and one coat of sheer nude. Let it dry.
- Paint a red French tip on each nail.
- With a liner brush, draw a thin white line just below the red, following the same curve. Seal with top coat.
Tip: Leave a hair-thin gap of nude between the red and the white. It makes the white line look sharper.
2. Alternating Red and White Tips
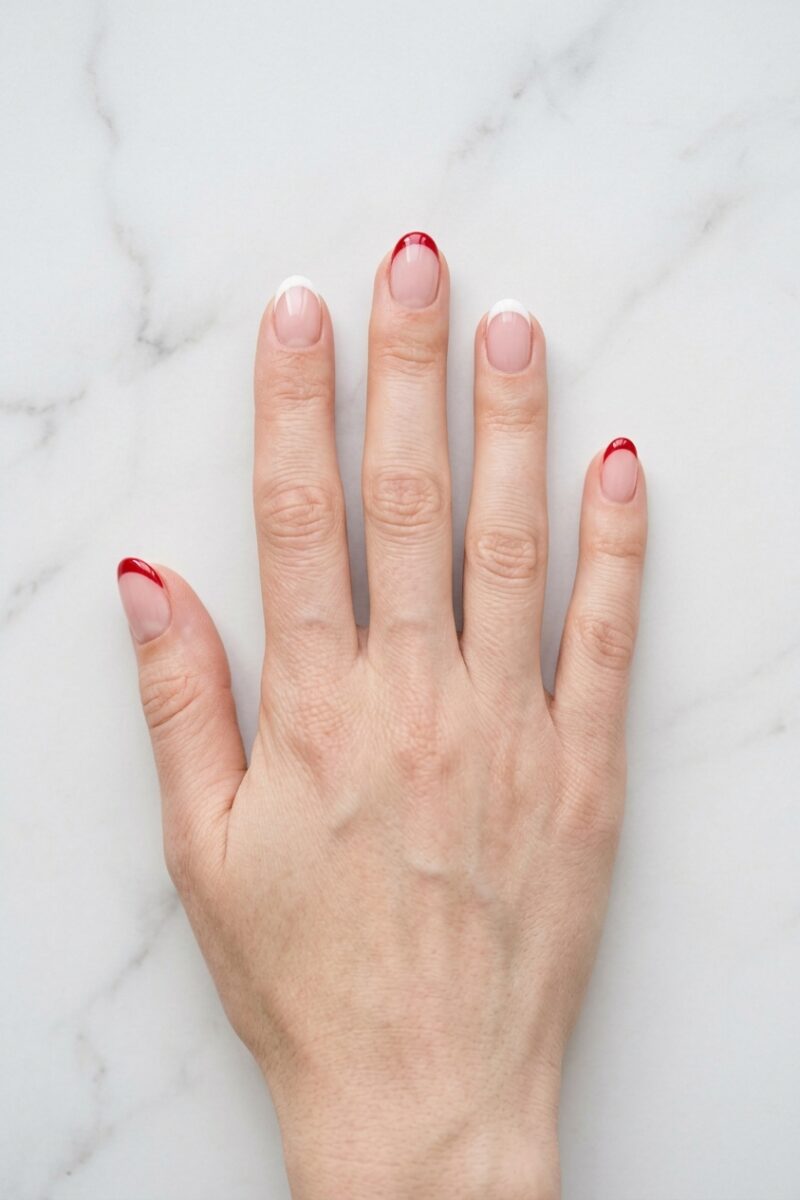
This is the simplest version of all. Paint normal French tips, and change the color on every other finger.
Skill level: Easy. Best for: Short nails and beginners.
- Paint a sheer nude base.
- Paint red tips on your thumb, middle finger and pinky.
- Paint white tips on your index and ring fingers, then add top coat.
Tip: Keep every tip the same thickness. Matching widths make the set look planned.
3. Half Red, Half White Split Tips
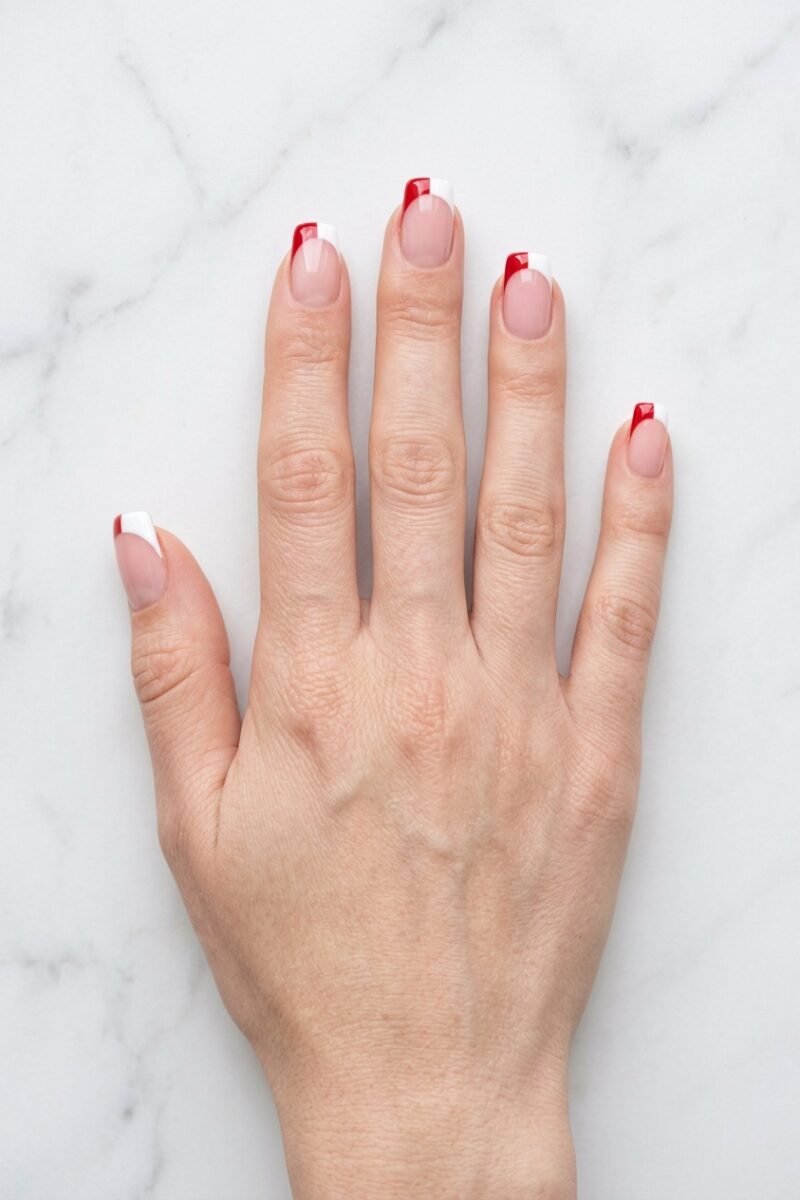
Each tip is split down the center, with red on one side and white on the other. It looks graphic and clever, and it is easier than it sounds.
Skill level: Medium. Best for: Square and squoval nails.
- Paint a nude base and let it dry fully.
- Paint the whole tip white.
- When the white is dry, paint red over one half of each tip, and seal with top coat.
Tip: Place a strip of striping tape down the center of the nail for a perfectly straight split.
4. Short Square Micro Tips
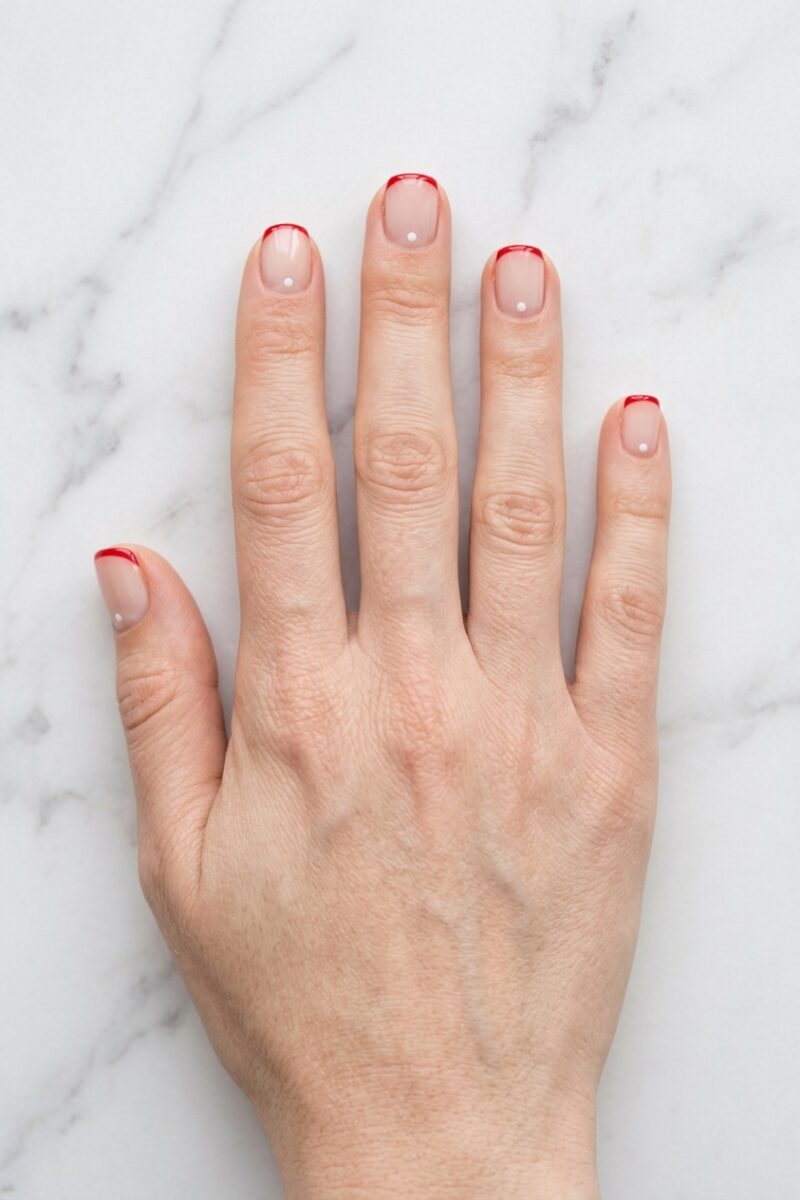
A micro French is a very thin line along the edge of the nail. On short square nails it looks tidy and expensive.
Skill level: Easy. Best for: Very short square or squoval nails, and work-safe manicures.
- Paint a milky nude base.
- Run a thin line of red along the very edge of each nail.
- Add one tiny white dot above the cuticle, then top coat.
Tip: For a thin line, wipe almost all the polish off the brush and use only the tip. See more in my short nail ideas.
5. Red Nails with White French Tips
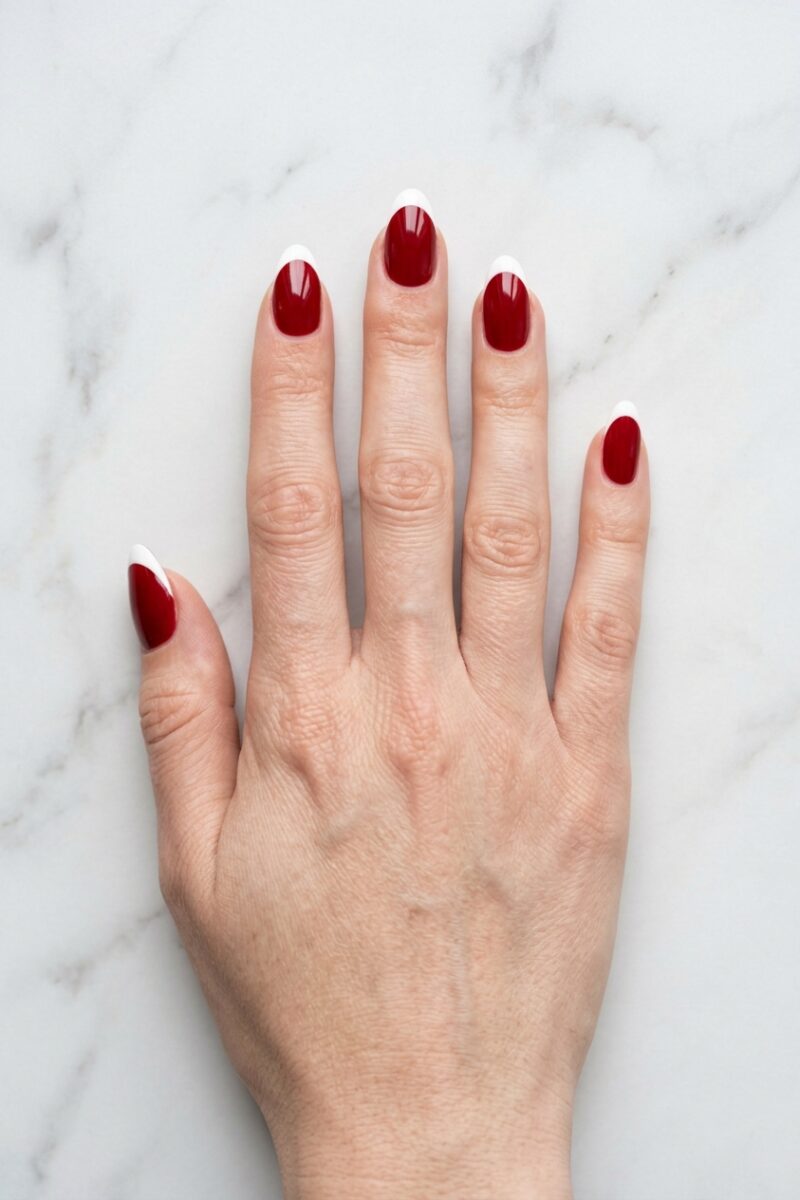
Here the whole nail is red, and the tip is white. It is the boldest simple design on the list.
Skill level: Easy. Best for: Almond, oval and coffin nails of any length.
- Paint two coats of red and let them dry completely.
- Paint a white tip on each nail. You will need two thin coats for the white to cover the red.
- Seal with a glossy top coat.
Tip: Wait at least ten minutes before the white. If the red is still soft, it will bleed pink into the tip.
6. Milky White Nails with Red Tips
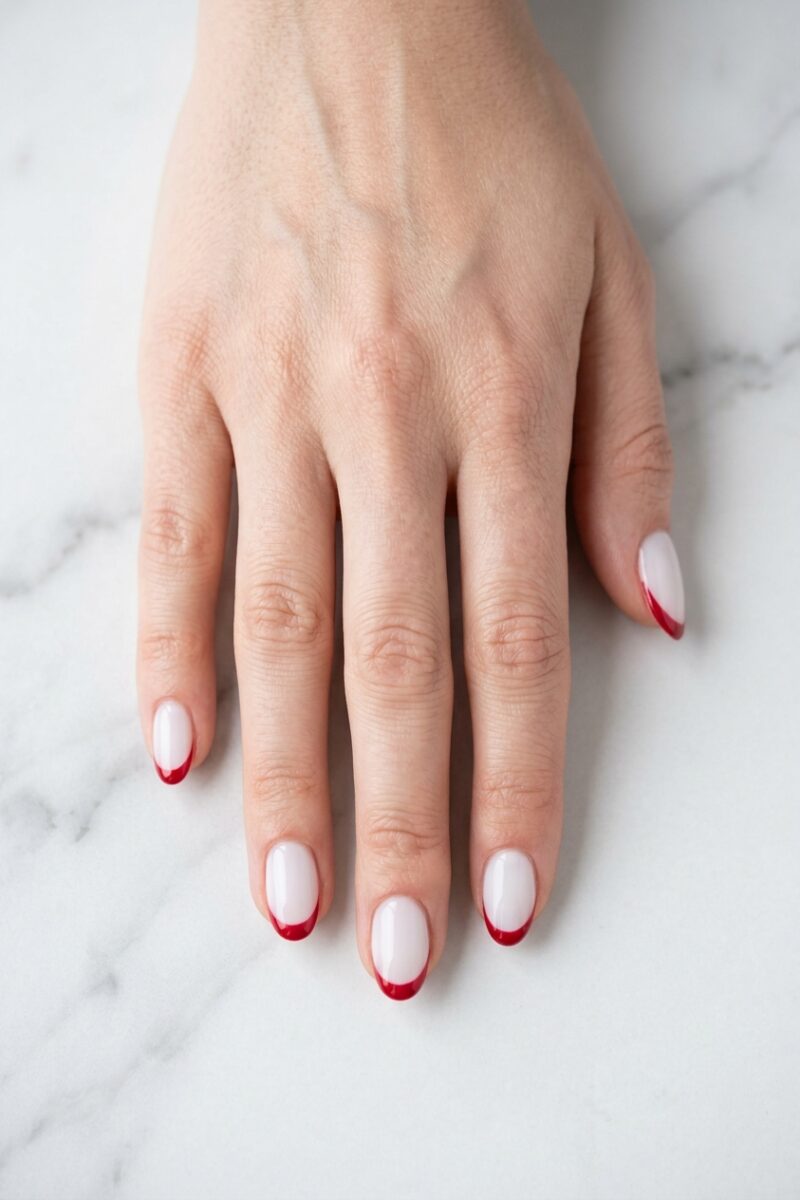
A milky white base with a slim red tip is soft, clean and very current. It is a good choice if a nude base looks dull on you.
Skill level: Easy. Best for: Short to medium oval or almond nails.
- Paint two thin coats of milky white.
- Add a thin red tip to each nail.
- Finish with top coat.
Tip: Choose a sheer, jelly-like white. A solid chalk white can look like correction fluid.
7. Coffin V-Tips in Red and White
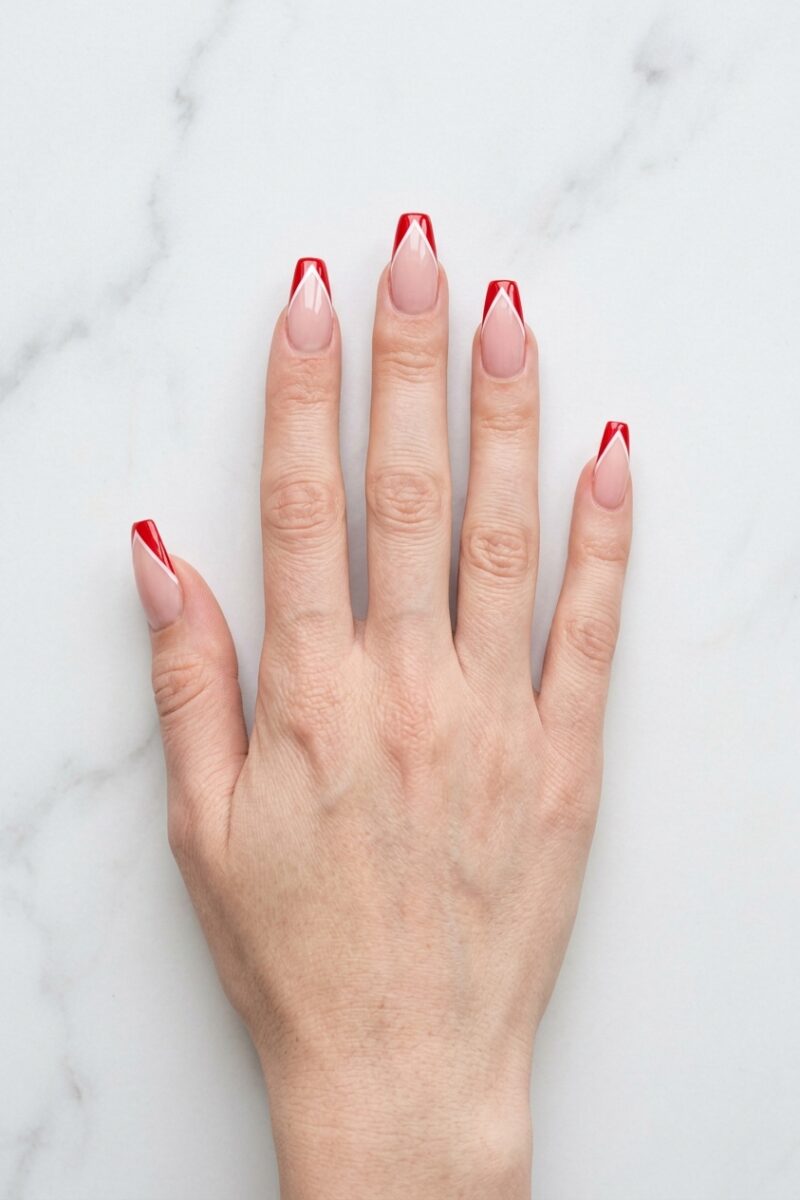
A V-tip, also called a chevron French, comes to a point in the middle of the nail. It makes coffin nails look longer and slimmer.
Skill level: Medium. Best for: Medium to long coffin, square or stiletto nails.
- Paint a nude base.
- Draw two red diagonal lines from the sides of the nail that meet in the center, then fill in the tip above them.
- Trace a thin white V just under the red, and seal with top coat.
Tip: Two strips of tape placed in a V make perfect straight edges.
8. Candy Cane Striped Tips
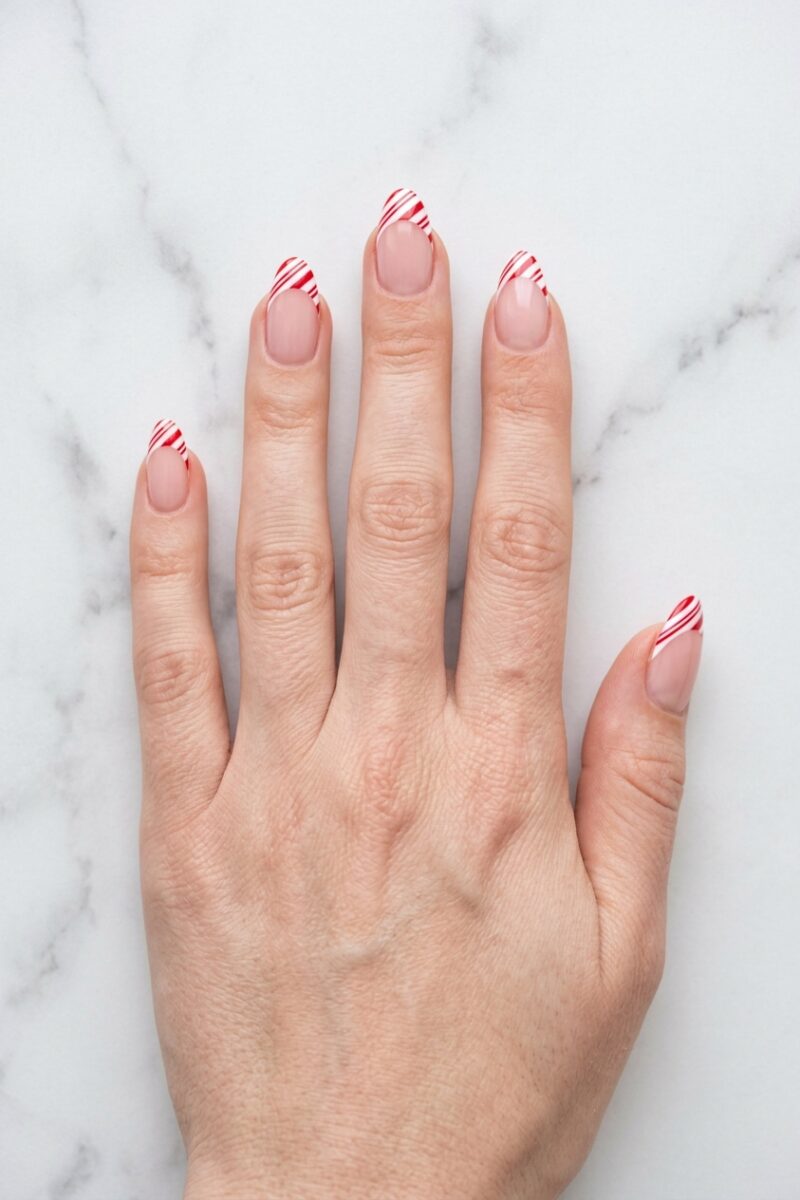
This is the Christmas favorite. Candy cane stripes on the tips only are festive and still grown-up.
Skill level: Medium. Best for: Medium almond or square nails, and Christmas.
- Paint a nude base, then a white French tip.
- When the white is dry, draw thin diagonal red lines across each tip with a liner brush.
- Seal with top coat.
Tip: Vary the stripes, one thick and one thin. That is what makes them read as candy cane.
9. Red Tips with White Polka Dots
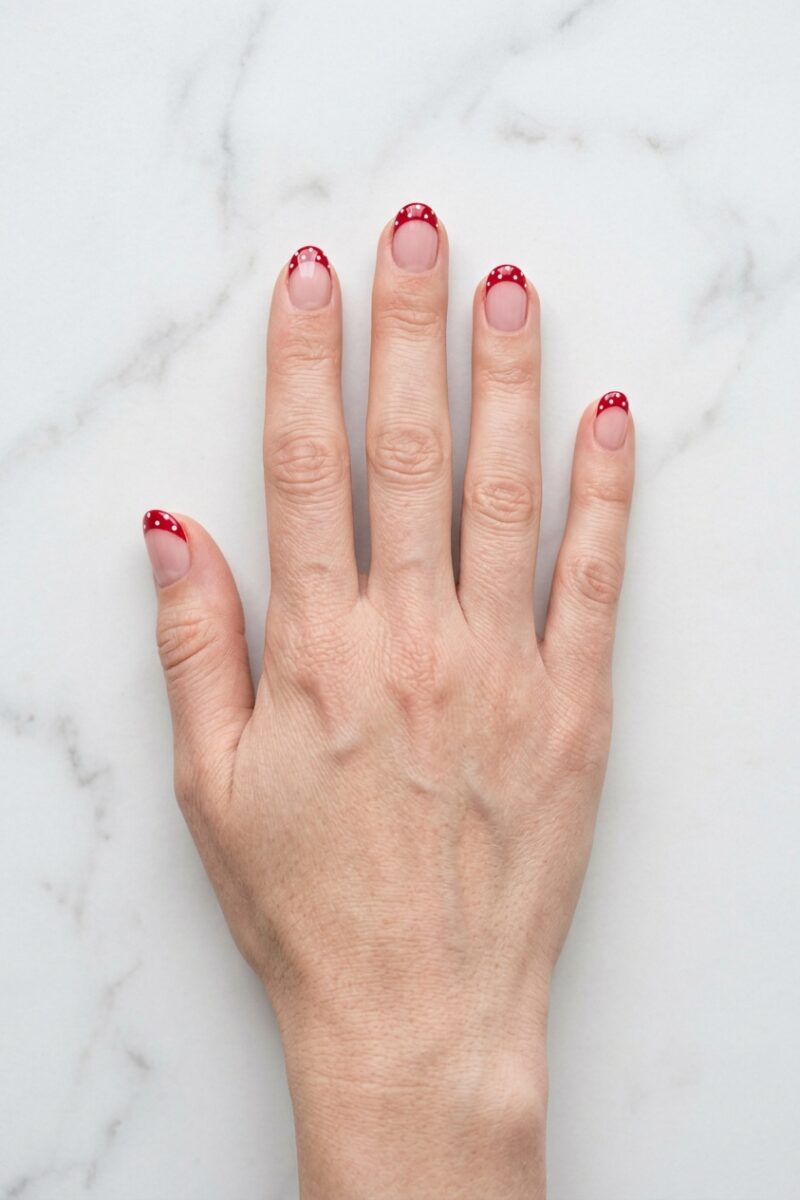
Polka dots give red tips a cute, retro feel. They are also the easiest nail art you can do.
Skill level: Easy. Best for: Short round or oval nails.
- Paint a nude base and red tips. Let them dry.
- Dip a toothpick in white polish and dot small spots over the red.
- Let the dots dry for a few minutes, then add top coat.
Tip: Reload the toothpick after every two dots, so they stay the same size.
10. White Tips with Tiny Red Hearts
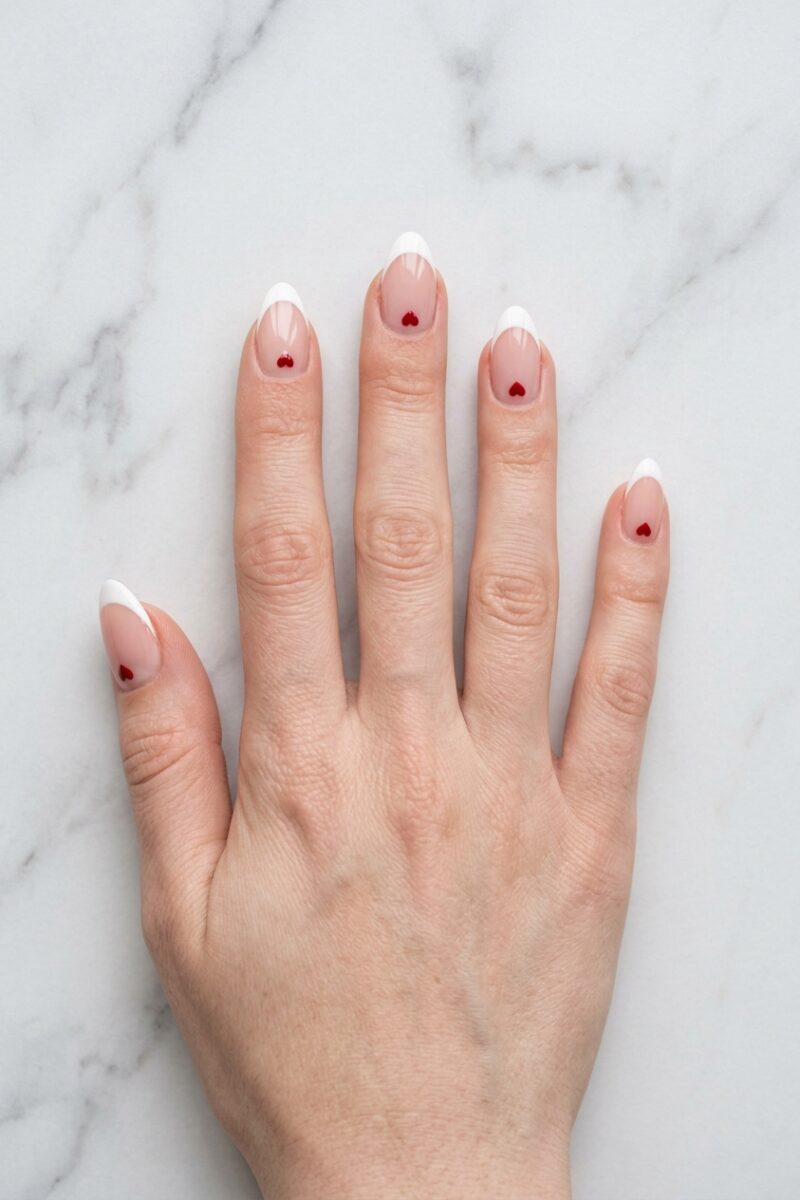
A classic white French with one small red heart is sweet and simple. It is the most popular Valentine’s Day manicure for good reason.
Skill level: Easy. Best for: Any shape, Valentine’s Day and anniversaries.
- Paint a nude base and white tips.
- For each heart, place two small red dots side by side.
- Drag both dots down to a point with a toothpick, then seal with top coat.
Tip: Put the heart on only one or two nails per hand for a more subtle look.
11. Red Tips with Cherries
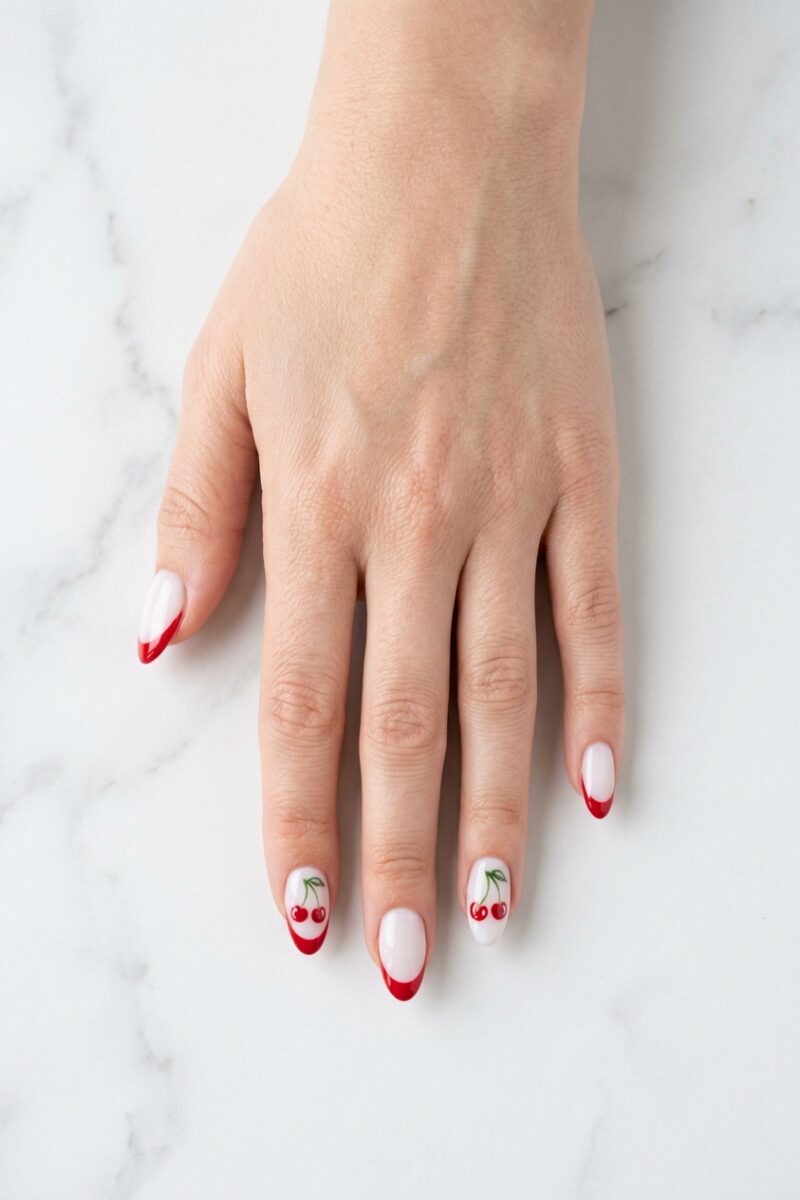
Cherry nails are everywhere right now. A pair of cherries under a red tip is playful and summery.
Skill level: Medium. Best for: Short to medium almond or oval nails, spring and summer.
- Paint a milky white base and red tips.
- On two nails, make two red dots close together for the cherries.
- Draw two thin green stems that meet at the top, add a tiny white highlight on each cherry and seal.
Tip: The small white highlight is what makes the cherries look round and glossy. Do not skip it.
12. Red Glitter Tips with a White Line
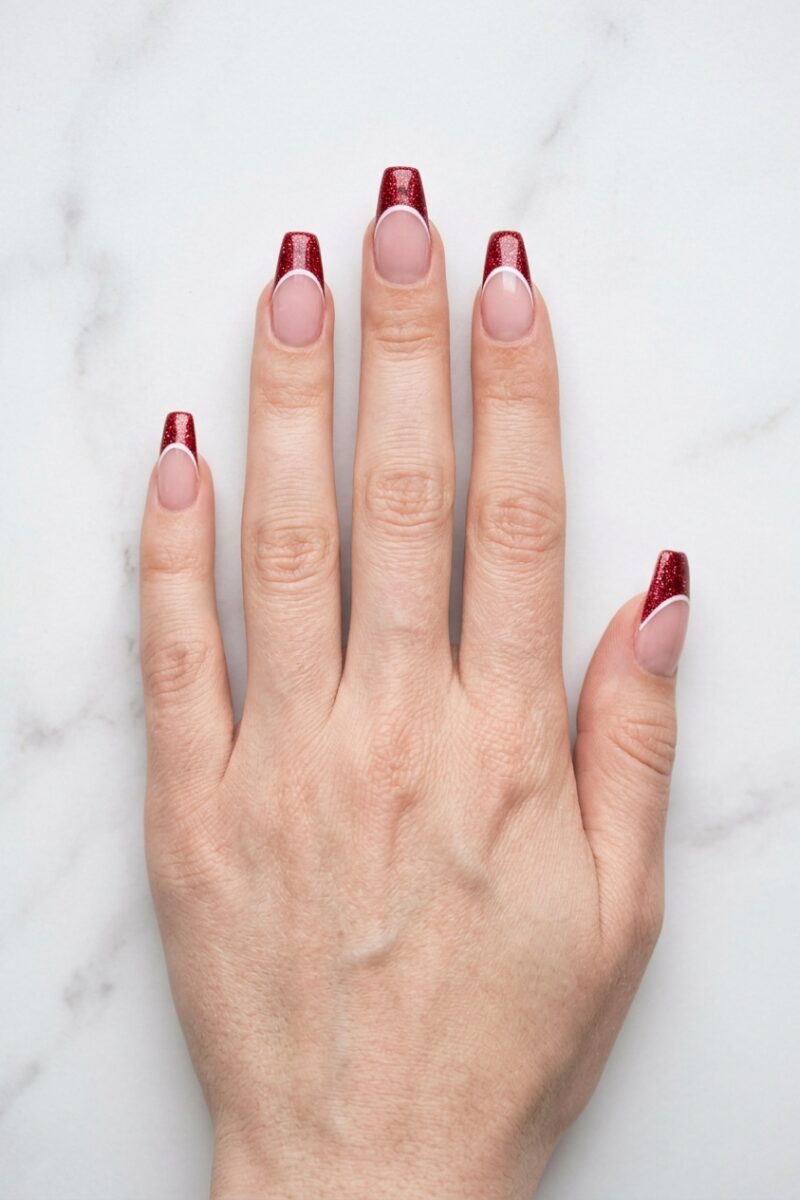
Red glitter tips are made for parties. The white line underneath keeps the glitter edge looking neat.
Skill level: Easy to medium. Best for: Medium to long coffin or almond nails, Christmas and New Year.
- Paint a nude base.
- Paint a red tip first, then dab red glitter polish over it with a small sponge.
- Draw a thin white line below the glitter, and finish with two layers of top coat for a smooth surface.
Tip: A red base under the glitter means you need far less glitter polish for full sparkle.
13. Red Chrome Tips on a Pearly White Base
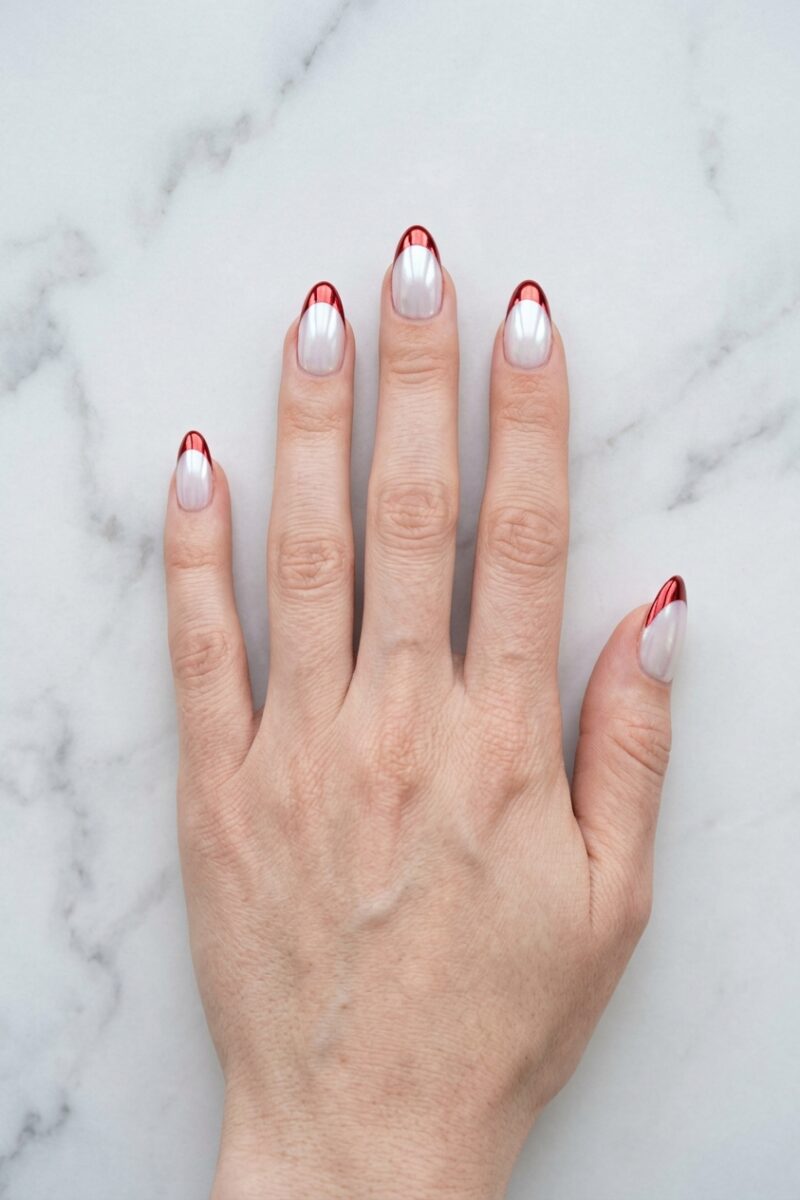
Chrome powder turns red tips into mirrors, and a pearly “glazed” white base makes the whole nail glow.
Skill level: Advanced, with gel and chrome powder. Best for: Medium almond or oval nails.
- Cure a milky white gel base, rub on pearl chrome powder and seal it.
- Paint red gel tips, cure them with a no-wipe top coat, and rub red chrome powder onto the tips only.
- Seal everything with top coat and cure.
Tip: This one is fiddly at home. Save the photo and ask your nail tech for “glazed white with red chrome French”.
14. Red and White Swirl Tips
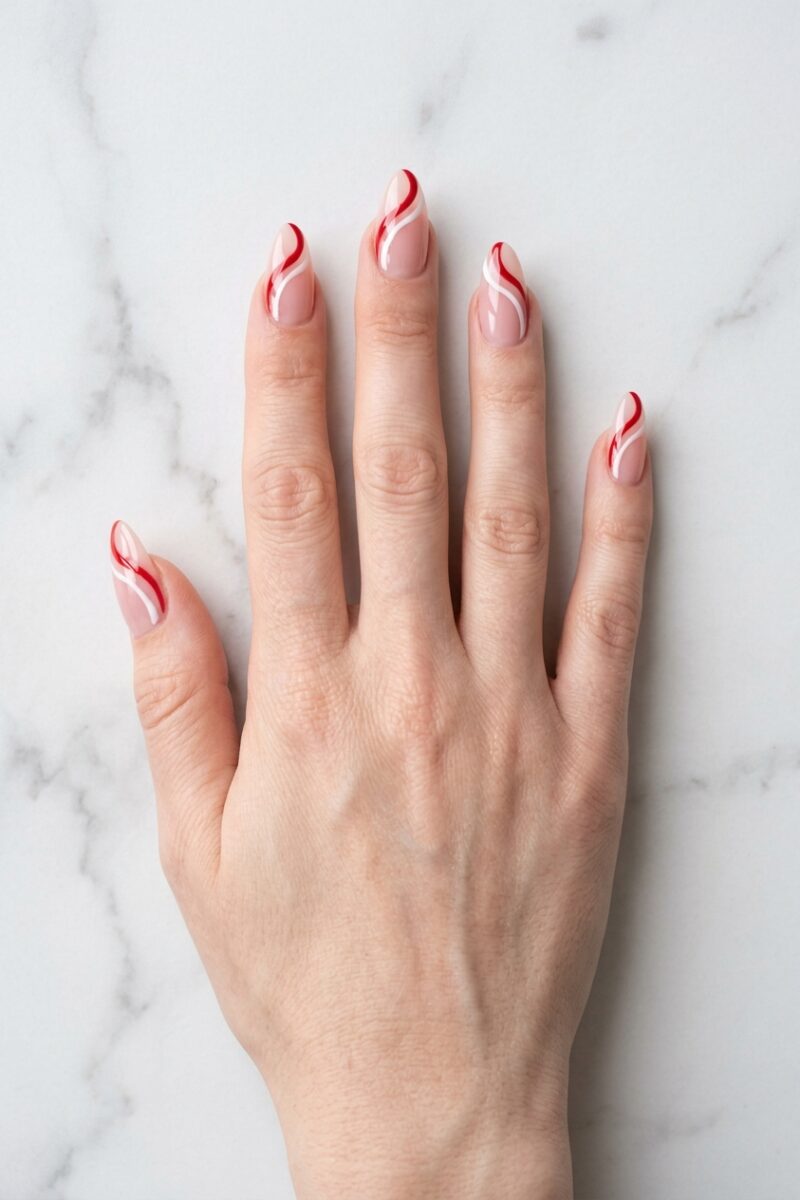
Swirl tips replace the straight smile line with soft, wavy ribbons of red and white. No two nails need to match, which makes it forgiving.
Skill level: Medium. Best for: Medium to long almond or stiletto nails.
- Paint a nude base.
- With a liner brush, draw one curved red S-shaped line across the tip area.
- Draw a white line that follows beside it, add one more of each if there is room, and seal with top coat.
Tip: Make each line in one smooth stroke. Going back over a swirl makes it lumpy.
15. Diagonal Side Tips
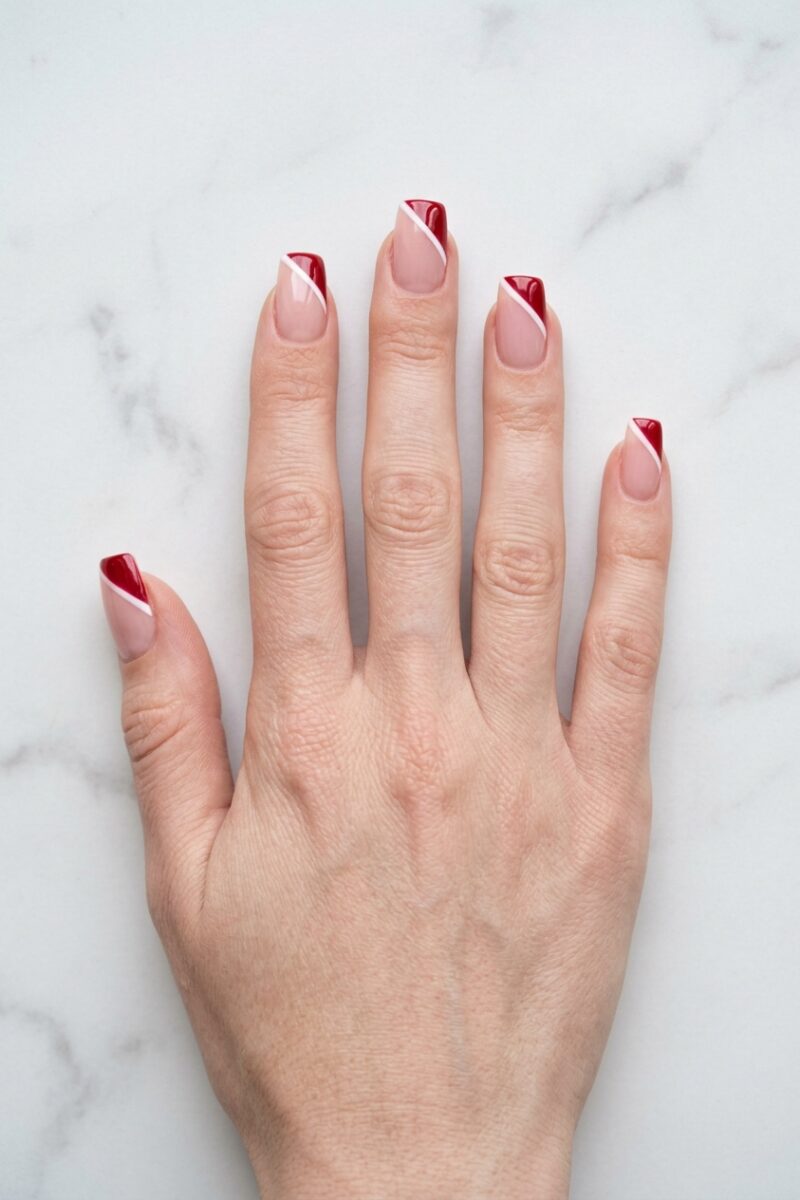
A side French slants across the corner of the nail. It is a small twist that looks very modern on square nails.
Skill level: Easy. Best for: Short to medium square nails.
- Paint a nude base.
- Stick a strip of tape diagonally across each nail, and paint the corner above it red.
- Peel the tape, draw a thin white stripe beside the red and add top coat.
Tip: Slant every nail toward the same side on one hand, and mirror it on the other.
16. Red Half-Moons with White Tips
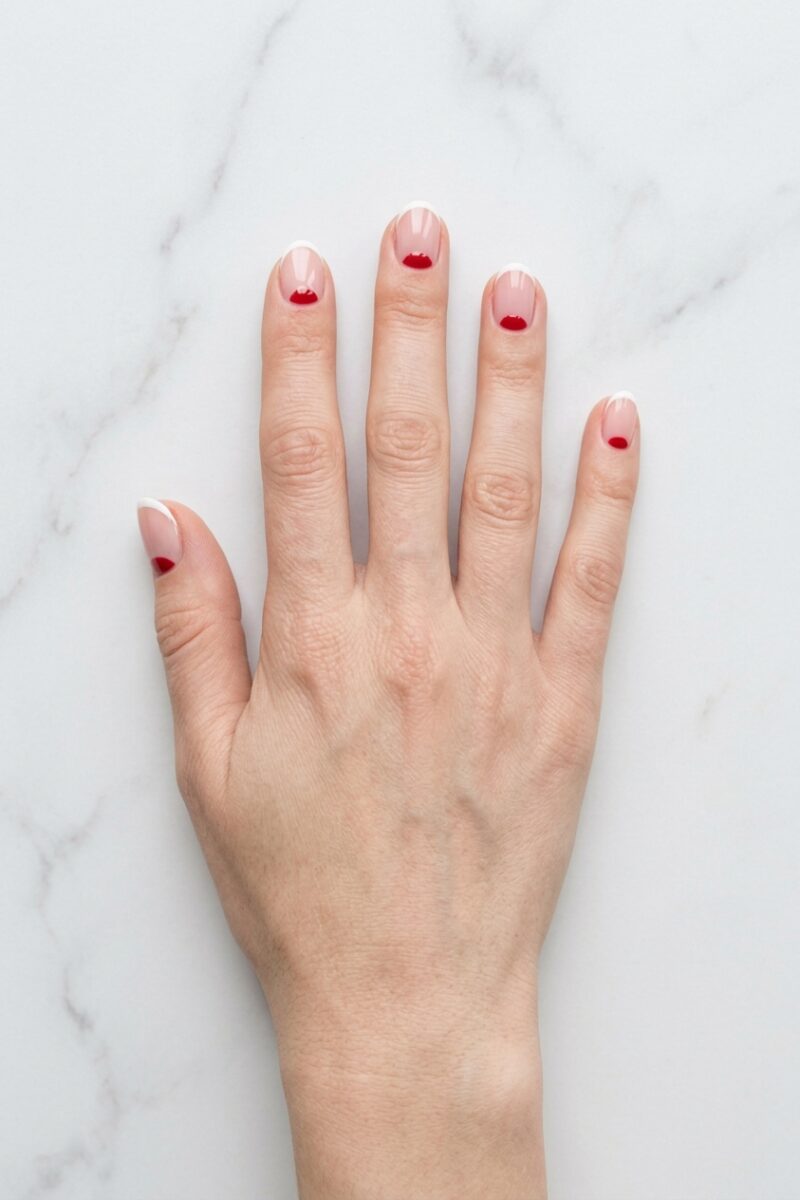
This reverse French puts red at the base of the nail and white at the tip. It has a vintage, 1940s feel.
Skill level: Medium. Best for: Short oval or round nails.
- Paint a nude base.
- Paint a small red half-moon along the cuticle of each nail.
- Add a thin white tip and seal with top coat.
Tip: Round hole-reinforcement stickers from a stationery shop make a perfect half-moon guide.
17. Dark Red and White French Tips
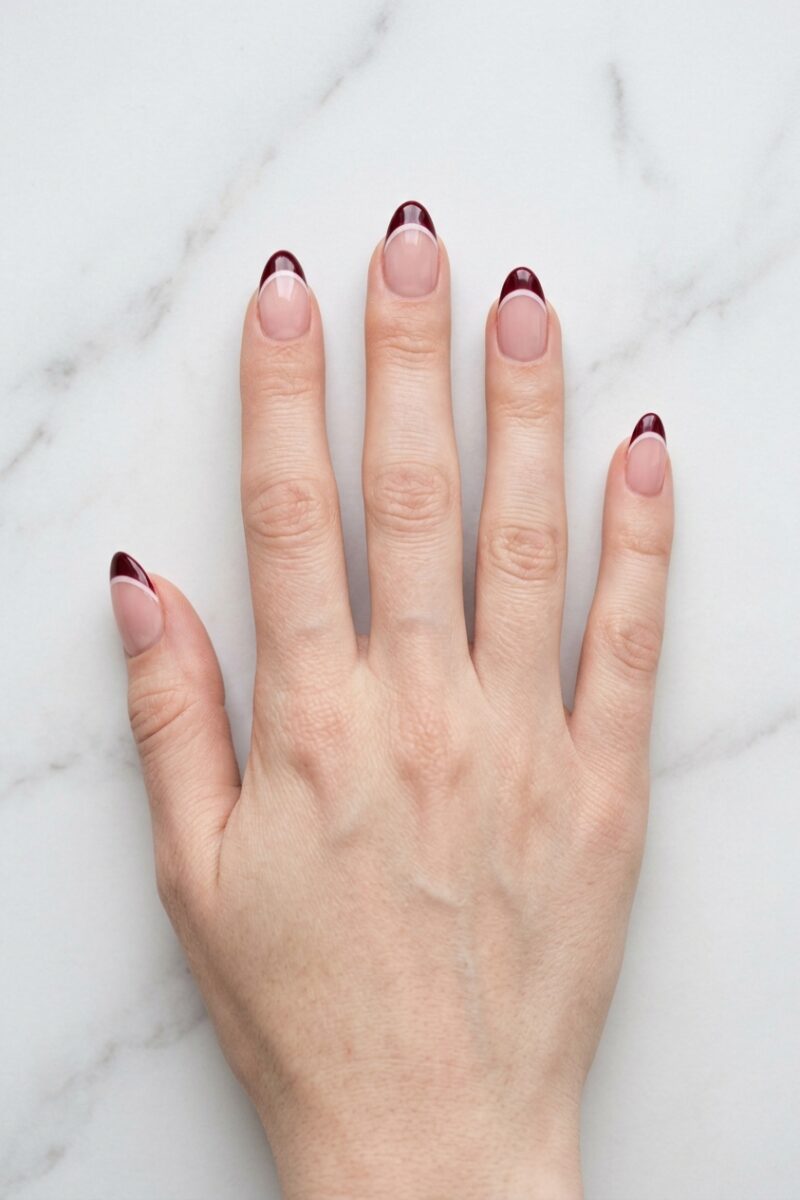
Swap bright red for deep wine or burgundy, and the look becomes rich and elegant. This is the version for fall and winter.
Skill level: Easy to medium. Best for: Any shape, fall, winter and evening events.
- Paint a nude base.
- Paint dark red tips. Deep shades often need two thin coats.
- Add a thin soft white line below, and finish with top coat.
Tip: Use an off-white or cream line with dark red. Bright white can look too stark next to it.
18. Pink, Red and White French Tips
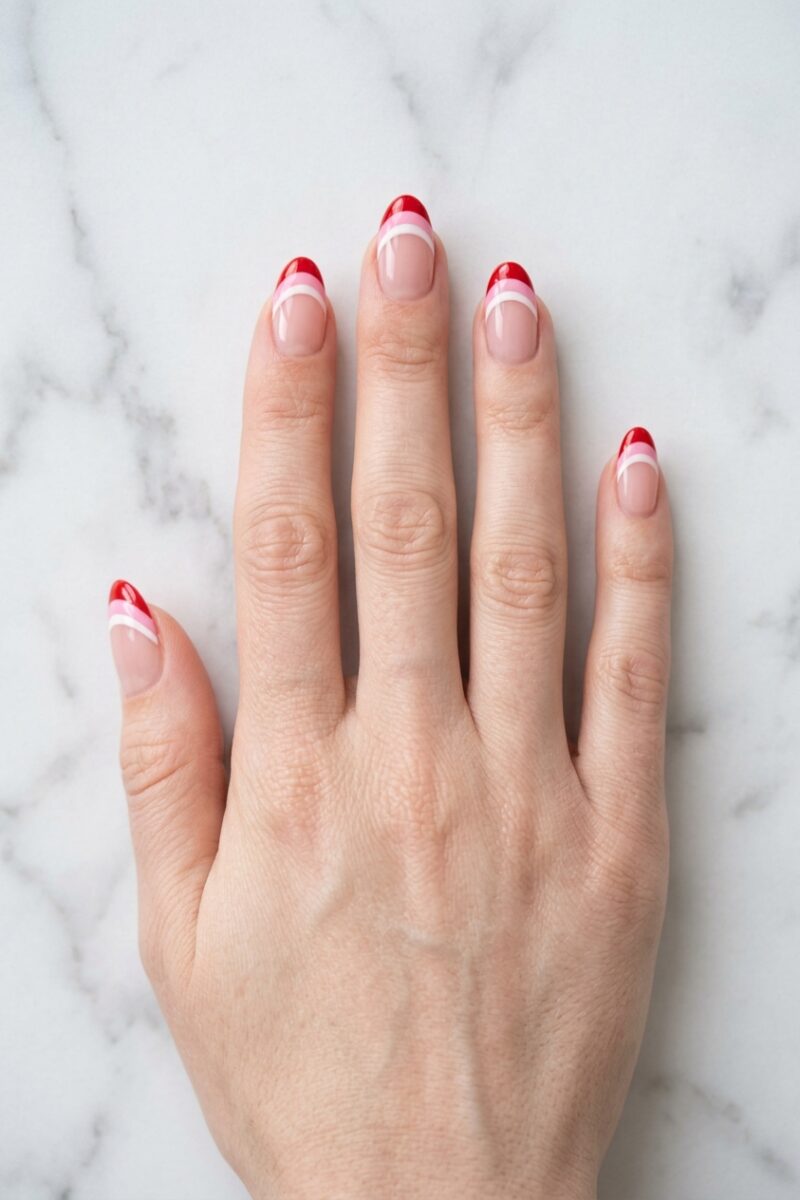
Add pink between the red and the white for a soft, three-color tip. It is the prettiest choice for Valentine’s Day.
Skill level: Medium. Best for: Medium to long almond or oval nails.
- Paint a nude base and a wide white tip.
- Paint a slightly narrower pink tip over it, leaving a thin band of white showing below.
- Paint a narrow red tip at the edge, leaving a band of pink showing. Seal with top coat.
Tip: Working from the widest band to the narrowest is much easier than painting three thin lines.
19. Red and White Tips with a Gold Line
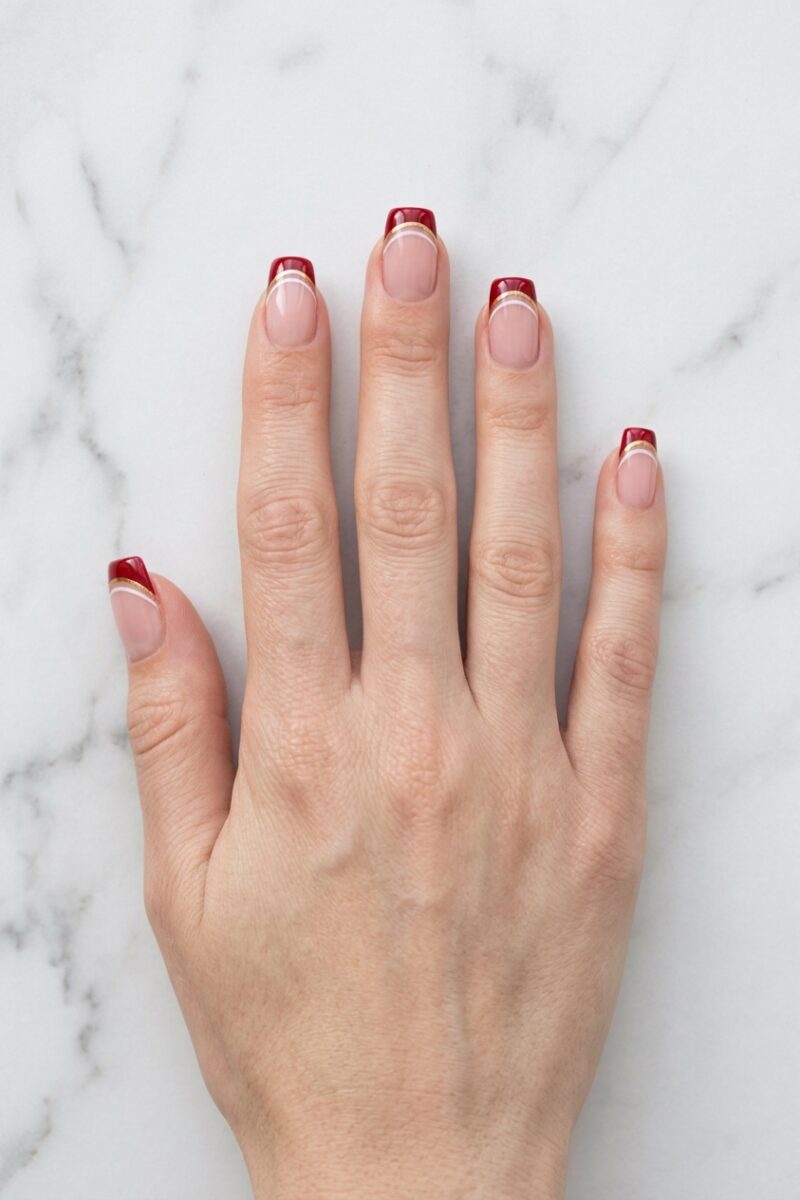
A fine gold line between the red and the white adds a touch of luxury. It suits weddings and holiday parties.
Skill level: Medium. Best for: Medium square, coffin or almond nails.
- Paint a nude base and red tips.
- Add a thin gold line under the red with gold polish or striping tape.
- Draw a thin white line under the gold, then seal with top coat.
Tip: Gold striping tape gives the cleanest line. Press it down well and cover it with two layers of top coat.
20. Red Tips with White Stars
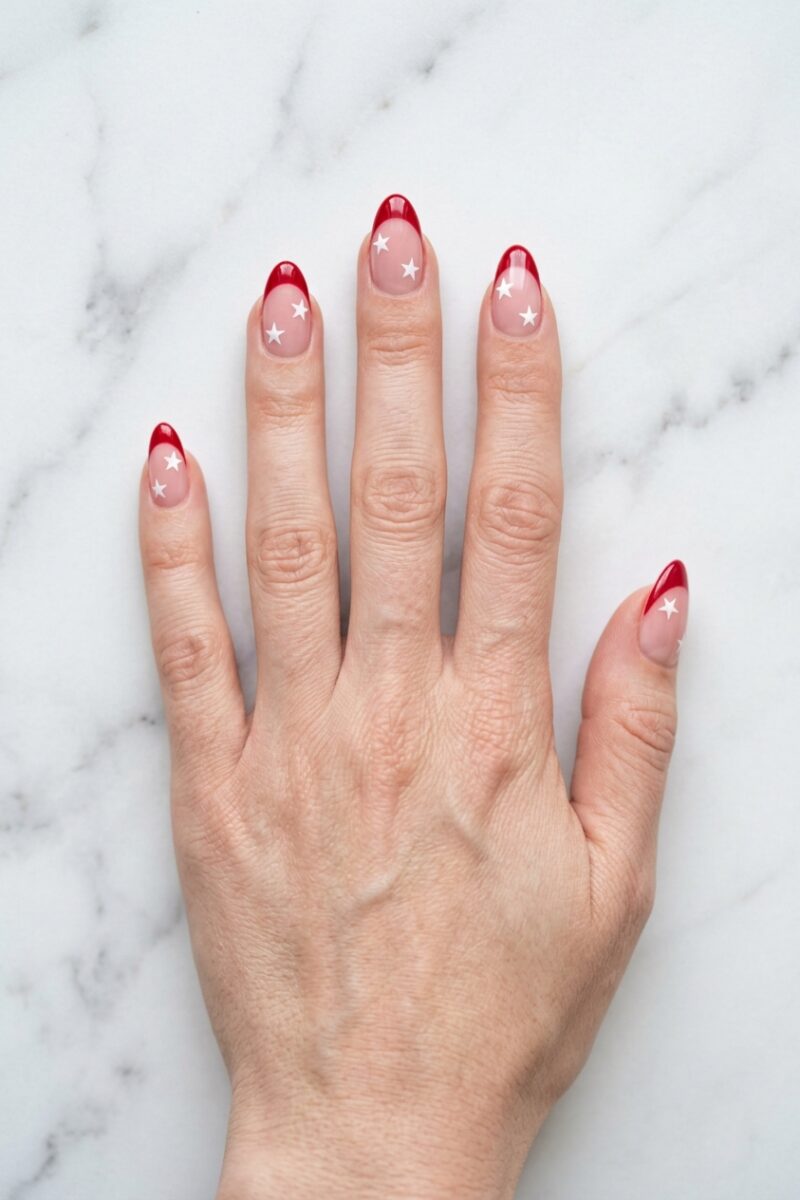
White stars on red tips are fun for the Fourth of July, concerts and game days. Add a blue accent nail for a full patriotic set.
Skill level: Easy with stickers, medium by hand. Best for: Any shape, summer holidays.
- Paint a nude base and red tips. Let them dry fully.
- Place white star nail stickers on the tips, or paint tiny stars with a dotting tool by pulling five points out from one dot.
- Seal with top coat.
Tip: Mix two sizes of star. It looks more natural than a row of identical ones.
21. Red Tips with White Daisies
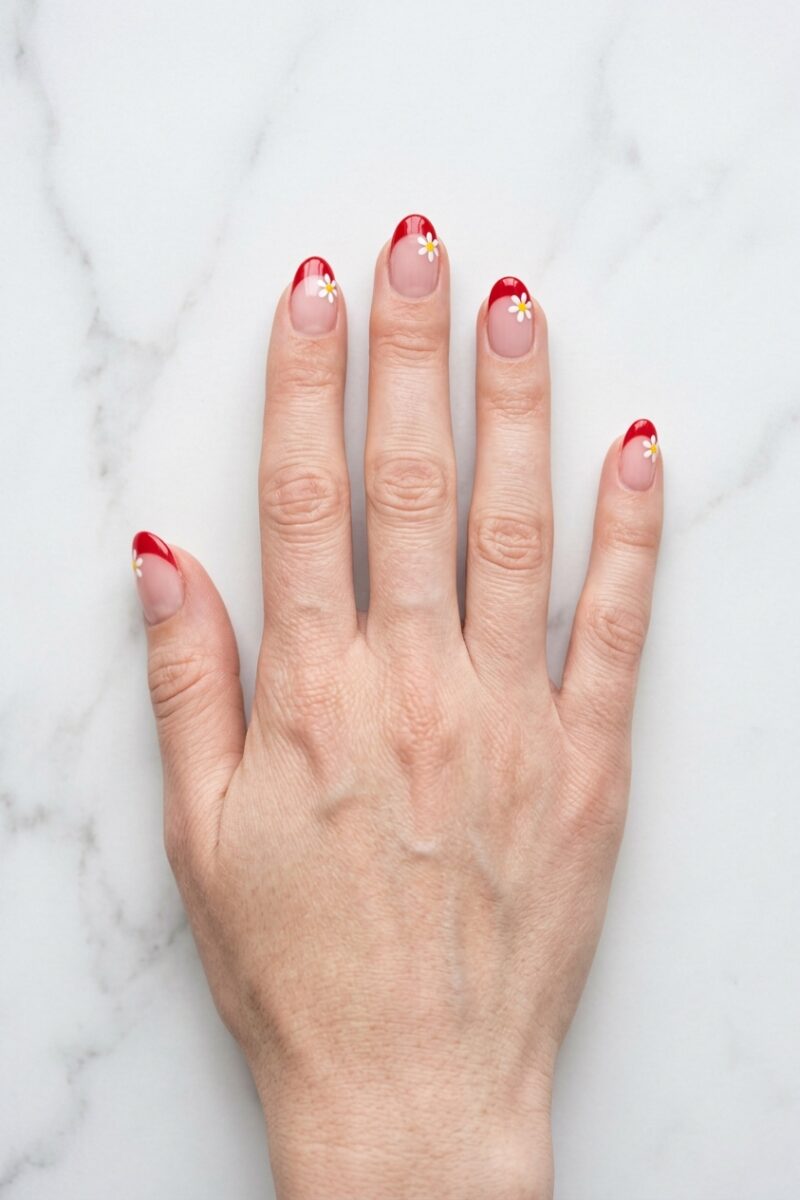
One white daisy on each red tip softens the look and makes it right for spring.
Skill level: Easy. Best for: Short to medium oval or almond nails.
- Paint a nude base and red tips.
- Dot five white petals in a circle where the red meets the nude.
- Add a yellow center and seal with top coat.
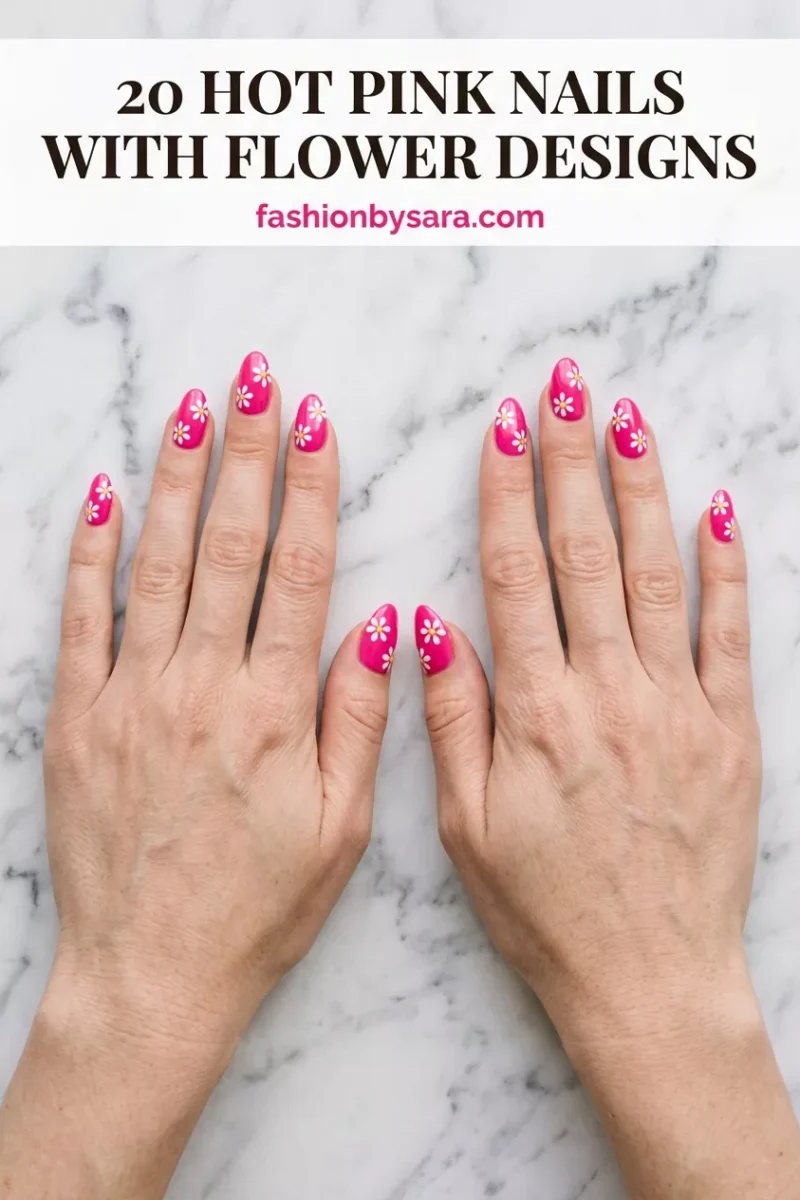
Tip: Love flower nails? See my hot pink nails with flower designs for 20 more ideas.
22. White Tips with a Tiny Red Bow
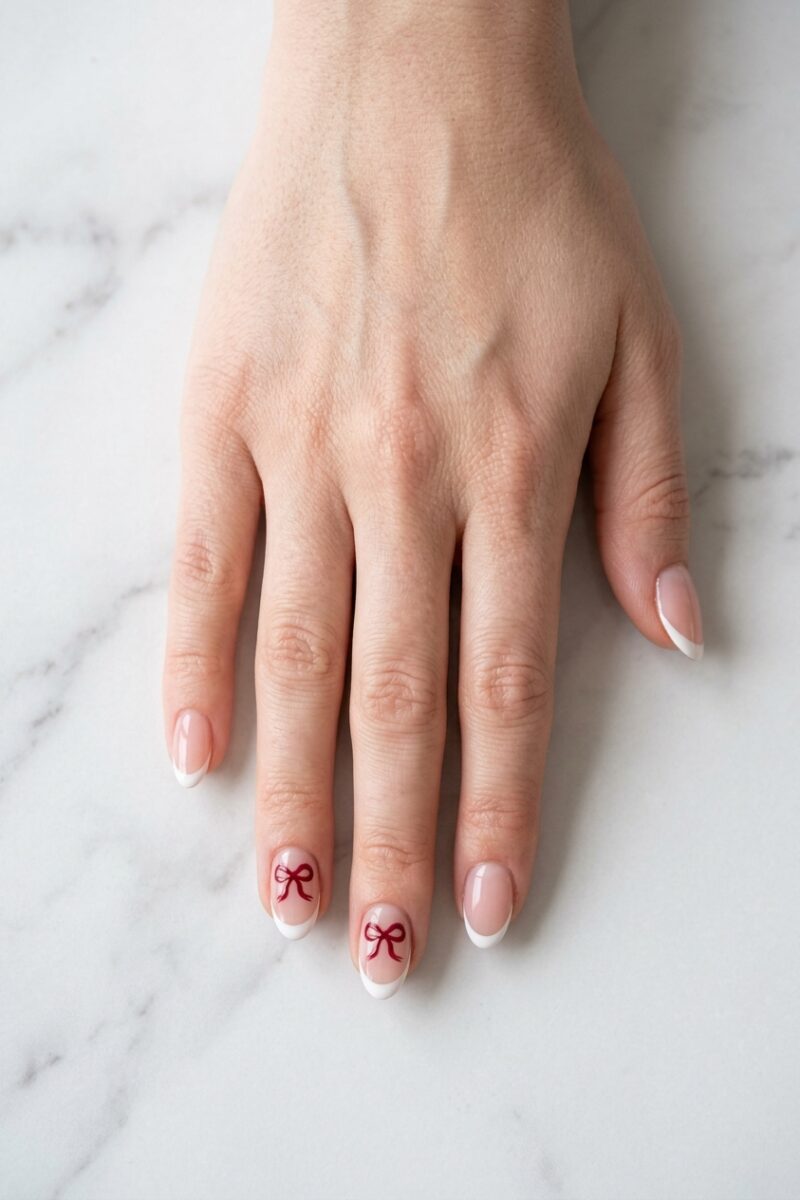
Bow nails are one of the sweetest trends of the moment. A tiny red bow on a white French is dainty and feminine.
Skill level: Medium. Best for: Short to medium almond or oval nails, Valentine’s Day and Christmas.
- Paint a nude base and thin white tips.
- On two nails, paint two tiny red triangles that meet at their points, like a sideways hourglass.
- Add two short lines hanging down from the center for the ribbon ends, then seal.
Tip: For a 3D version, glue on tiny red bow charms and seal around the edges with top coat.
23. Red Tips with a White Snowflake
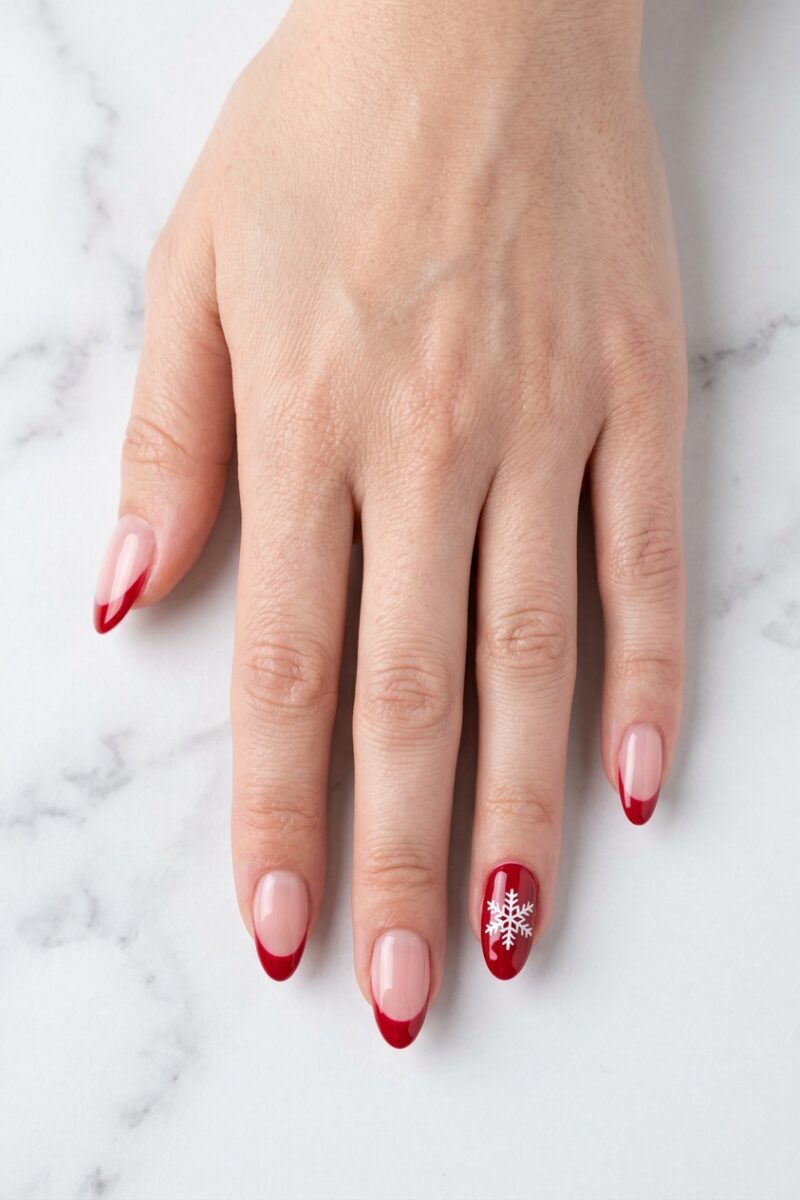
Red French tips with one snowflake accent nail are festive without being over the top. You can wear them all December.
Skill level: Medium. Best for: Any shape, Christmas and winter.
- Paint red tips on four nails and paint the ring finger fully red.
- On the red nail, draw a white cross and an X through its center to make eight arms.
- Add tiny V shapes to the end of each arm and a dot in the middle. Seal with top coat.
Tip: Snowflake stamping plates and stickers give a perfect result in seconds.
24. Red to White Ombré Tips
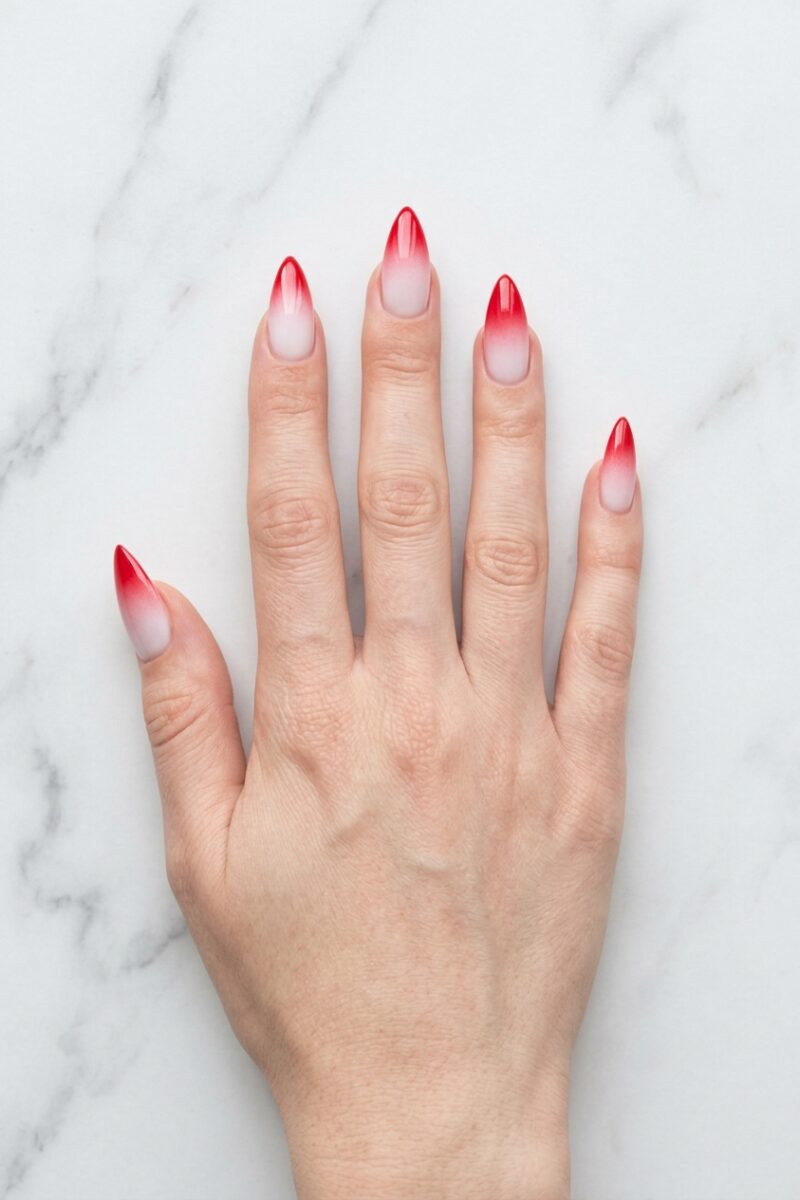
An ombré French has no smile line at all. The white base melts into a red tip, which looks soft and airbrushed.
Skill level: Medium. Best for: Long stiletto, almond or coffin nails.
- Paint a milky white base.
- Paint stripes of white and red side by side on a makeup sponge.
- Dab the sponge onto the nail with the red at the tip, repeat two or three times, and blend with top coat.
Tip: Where red and white blend, you get a band of pink. That is normal, and it is part of the look.
25. Red and White French Tip Toes
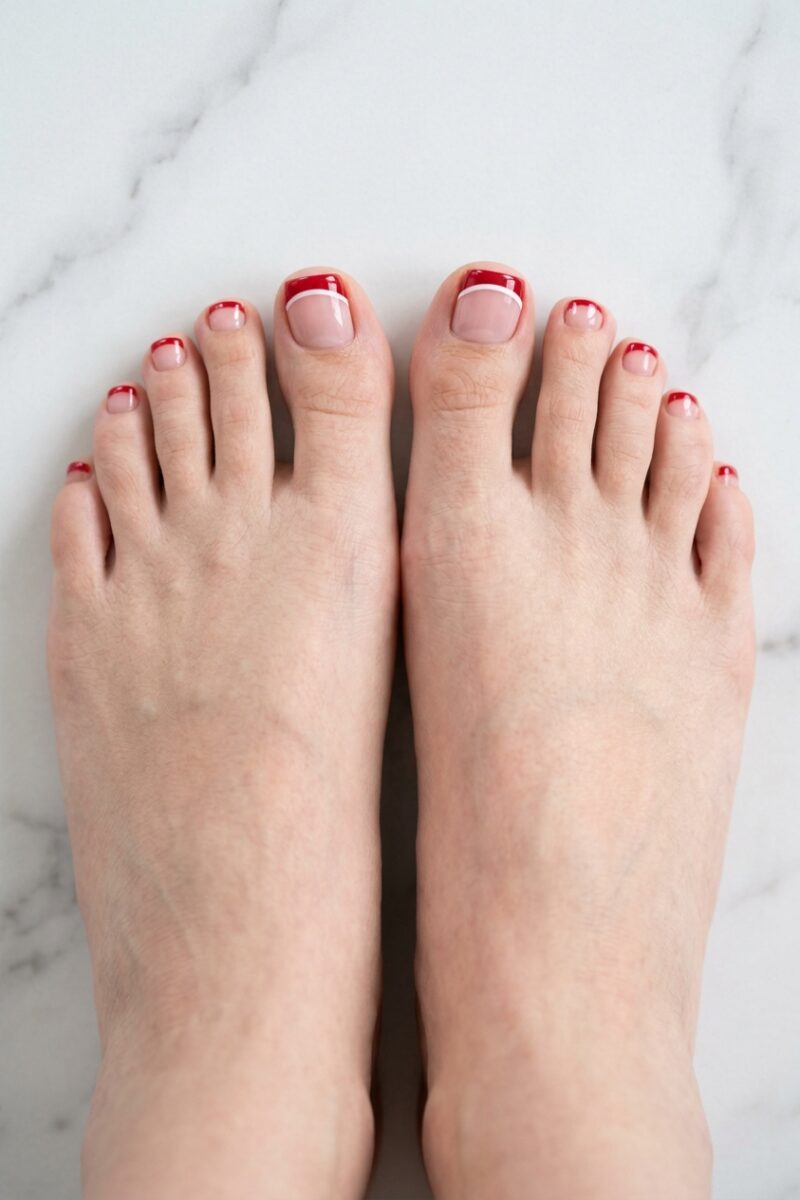
Carry the look down to your toes. A red French pedicure is fresh for sandal season and matches any of the manicures above.
Skill level: Easy. Best for: Summer, vacations and matching manicure and pedicure sets.
- Paint a sheer nude base on all toes.
- Paint a red tip on each toenail. On the small toes, one swipe across the edge is enough.
- Add a thin white line under the red on the big toes only, then seal with top coat.
Tip: Keep nail art for the big toe. The other toenails are too small for detail, and simple tips look cleaner.
Tips for Crisp French Tips That Last
- Use a base coat. Red polish stains natural nails, and a base coat prevents it.
- Use thin coats. Two thin layers of red dry faster and chip less than one thick one.
- Let red dry before white. Wet red bleeds into white and turns it pink.
- Match the tip to your nail length. The tip should cover about a quarter of the nail. Keep it thinner on short nails.
- Clean the smile line. A small flat brush dipped in remover fixes wobbles in seconds.
- Cap the free edge. Run top coat along the very edge of each nail, since tips are where chips start.
- Refresh the top coat. A new layer every three days keeps regular polish glossy for a week or more.
Frequently Asked Questions
How do you do red and white French tip nails at home?
Paint a sheer nude base, add a red French tip using guide stickers or a silicone stamper, then draw a thin white line just below the red with a liner brush. Finish with a glossy top coat.
Do red and white French tips work on short nails?
Yes. Keep the tips thin, such as a micro French, and choose simple designs like alternating tips, polka dots or one small accent. Thick tips make short nails look shorter.
What nail shape is best for red and white French tips?
Almond and oval nails give the smoothest curved tip. Square nails suit straight, split and diagonal tips, and coffin and stiletto nails suit V-tips and ombré.
When should I wear red and white French tip nails?
They are most popular for Valentine’s Day, Christmas and the Fourth of July, but a simple red tip with a white line works all year, including at the office.
Which red should I choose?
A classic true red suits everyone. Choose bright cherry red for a playful look, and dark red or wine for fall, winter and evening.
Should I use gel or regular polish?
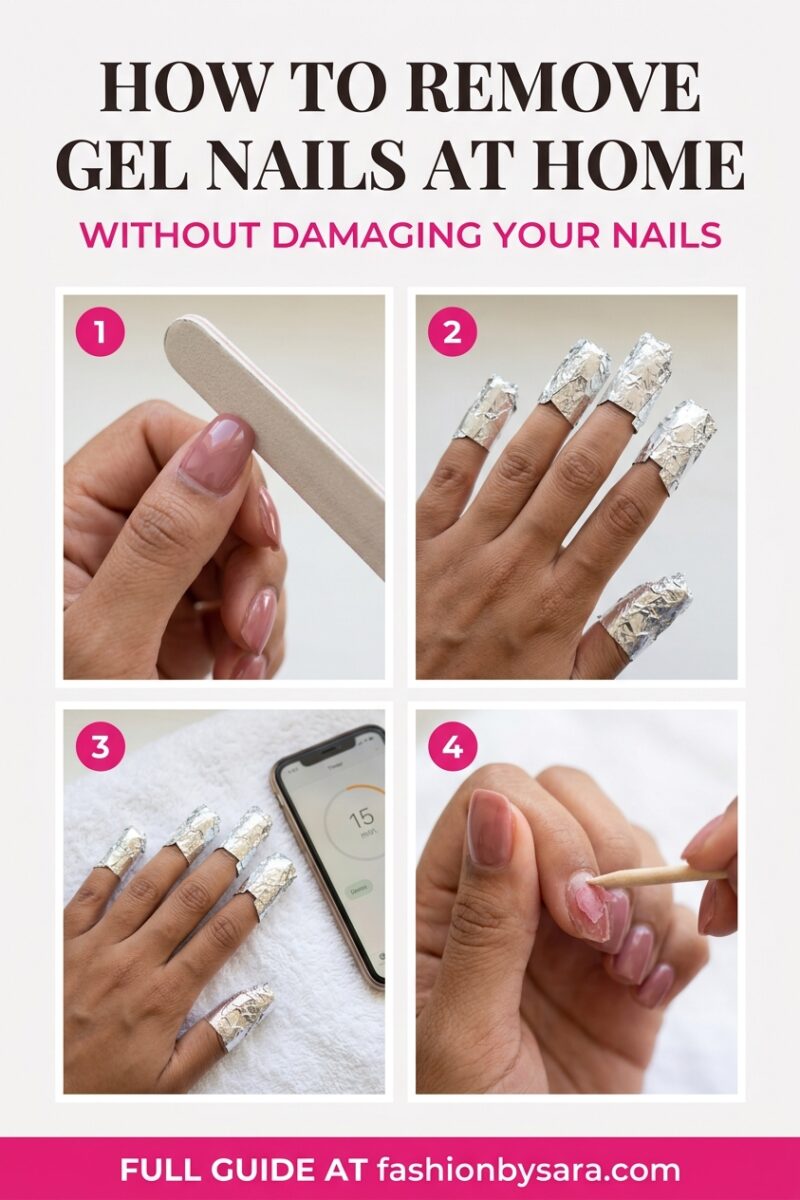
Regular polish is fine for simple tips and lasts about a week with a good top coat. Gel gives sharper lines, does not smudge and lasts two to three weeks. To take gel off safely, follow my guide on how to remove gel nails at home.
What do I ask for at the nail salon?
Ask for a “red French tip with a white outline” on a sheer nude base, and name the shape and length you want. Showing a saved photo is the surest way to get the exact design.
Final Thoughts
Red and white French tip nails take a classic manicure and give it more personality. Start with a red tip and a thin white line, or alternate the two colors on short nails. Then try hearts, candy cane stripes or glitter when the season calls for it.
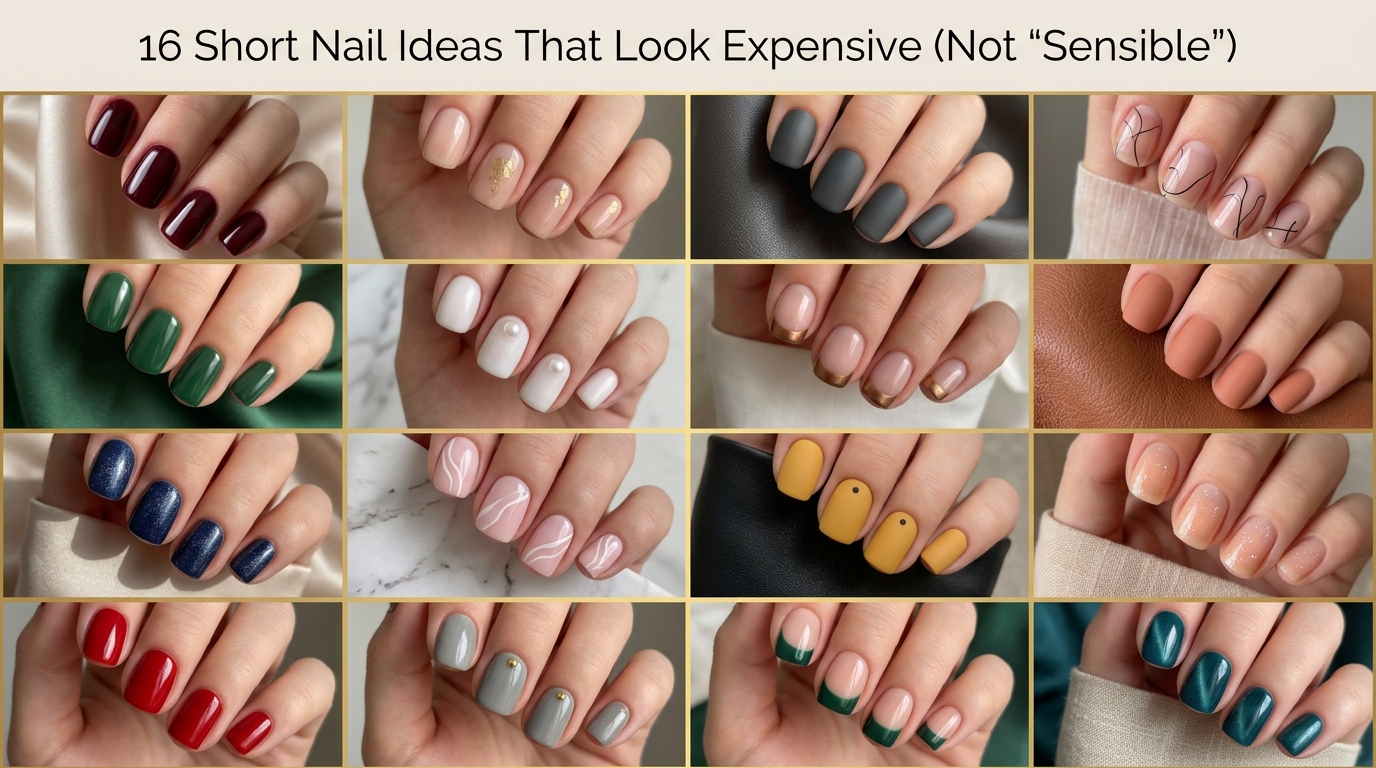
For more easy ideas, see my simple nail designs you can do at home and these short nail ideas that look expensive. Save this pin for your next nail appointment.


Leave a Reply